Posts

Showing posts from October, 2018

GDP #162-Sketch Challenge: Snowflake Showcase Card

Image
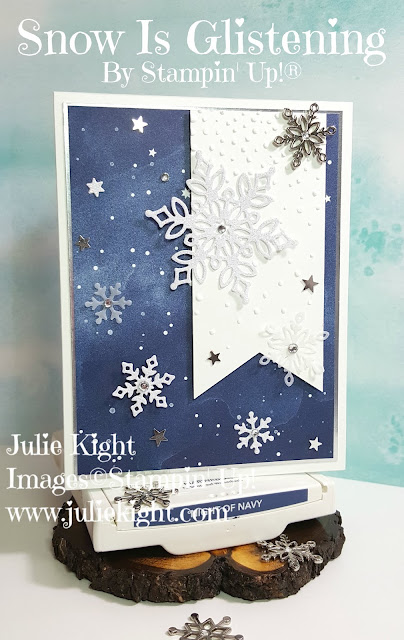
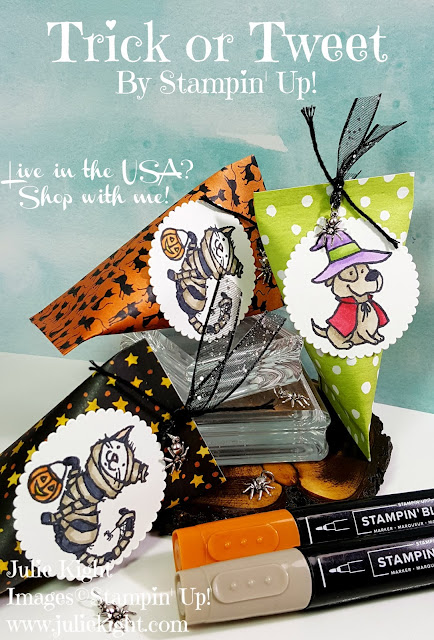
     Hello everyone! Are you ready for Halloween tomorrow? Have you picked out your costume yet? I'm not sure what I am doing yet, but have purchased the bowl full of candy for the kids coming to the door tomorrow night. This week GDP is having a sketch challenge that I wanted to try out with the new Snowflake Showcase. Here is the sketch.....      I had been thinking about doing a night scene with the snowflakes and remembered about this piece of paper from the Twinkle Twinkle DSP (Designer Series Paper) and knew it was what I wanted. I put a piece of Silver Foil paper behind to give more shine.      I did the snowflakes in both the Sparkle Glimmer paper and in the Vellum paper to give more texture. I also put some of the Twinkle Sequins and the Basic Rhinestones to add a bit more sparkle and shine. I really wanted to look like snowflakes falling on a night sky.      On the inside I just used one of the sentiments and stamped some snowflakes around the edges too

Spooky Sweet Halloween Bat Card

Image
     Hi everyone. How was your weekend? I didn't do too much, but clean up my craft room a bit. I'm also trying to get all the old photos on my computer off and on to DVDs for safe storage. All the photos are starting to take up too much space on my hard drive. On to my card. Today I have a cute Halloween card using the stamp set Spooky Sweet and the coordinating punches. Here is the card...      A bat of a different color! Bats don't have to be black do they??? Not around Halloween, lol. I did, however, use typical Halloween colors. I loved how the colors of the bats contrast with the white background that I also used an embossing folder on.      I also heat embossed the small banner under the moon to provide some shiny black clouds as kind of an opposite to a black sky with white clouds. I used a piece of the sparkly Black Organdy ribbon as another accent. I put some of the Basic Rhinestones and the Twinkle sequins around on the card to as to represent the night sk

Halloween Sour Cream Treat Containers-Facebook Live

Image
     Hey everyone! Are you ready for the weekend? Any big plans? Not here, just going to work on some crafty things. My husband and I may go to a ghost tour of an old inn up in the Painted Desert, but unsure yet. Did you catch my Facebook Live yesterday? I made this really cute Halloween treat sour cream container. If you did miss it I have included it below. Here they are.....       These are so easy and quick to make. What took the longest was just the coloring of all the animals, but you don't need to be that detailed. The containers are 4"x 5" in size. This seemed to be the perfect size for me.      As I said in the video, I would only put food that is in a protective wrapper, and if you are giving these to small children I would only use tape to close them as staples may harm them. Also, if giving to small children I wouldn't put the Spider Trinket on as this could pose a choking hazard. The container would look just as cute with just the ribbon because

Stampin' Up! 24 Hour Birthday Sale!

Image
     Today is Stampin' Up!'s birthday, and you are getting the gifts! For 24 hours only select stamp sets are 15% off. Have a stamp on this list that you have been wanting to buy??? Jump on it now as it is only on sale for 1 day. If you have any questions just email me.....scrapnmom@live.com. Click here to start ordering !!! Here is the list..... Hugs, Julie

Making Every Day Bright Halloween Card

Image
     Hi, it's Moan-day! Lol. I thought with Halloween just around the corner I would be showing a little more Halloween ideas. Today for you I have a card using a really cute stamp set, Making Every Day Bright.      Now this stamp set is a sister stamp to the bundle Making Christmas Bright. The Christmas Bulb Builder punch works with both of these stamp sets which of course makes it so easy to quickly cut out your items.      I heat embossed the spider web bulb and the string. I punched out the socket part from Silver Glimmer paper. I decided to do each bulb in a different Halloween color. I used a piece of the Black Foil paper as my background. It gives a very shiny look.      I also used some of the Toil & Trouble DSP (Designer Series Paper) for the strip. I placed some of the Glittered Enamel Dots around my title along with one of the very cute Spider Trinkets. As you can see from the others they have a jump ring and a small loop on them. I simply just removed the

Snowflake Showcase Facebook Live and Card

Image
   Hello my friends.....it is Friday!!! Any plans this weekend??? I am going to work on a few things, like cleaning off my craft desk and then I need to set up my camera so that I can do some more lives for you with doing some tutorials. I had a lot of fun today doing the live on my Facebook Business page. Here is the card I showed on it.      The Snowflake Showcase is absolutely beautiful! There is so much to play with. I wanted to do a fun watercolor for my first card with it. As I said in the video the large die on this card is my fave in the whole set so it had to be the first one I wanted to use.      The White Velvet paper is so beautiful and fuzzy! I love the feel of it. It dies cuts and embosses with great ease. In fact the embossing is gorgeous. I also showed the Snowflake Trinkets which I included on my card.      I used some of the snowflake stamps on the inside of my card too, because who wants a naked card! I also added a sentiment. As I said in the live this

Feathers and Frost Bird Card

Image
     Hey people! How is your week going? My fave season of the year is Fall and I so look forward to it each year. Well this year it started to feel like Fall at the very end of August and then all of a sudden on Oct 1st it has been feeling more like Winter is here. We actually had snow about 20 miles from us yesterday. What happened to my Fall???      Today for you I have a very simple card that I made using the stamp set Feathers and Frost. What really enticed me to get his stamp was the samples in the Holiday Catalog. I loved how the branch formed a square verses a round wreath.      I am loving this new Subtle Dynamic TIEF! I know that in the Annual Catalog it is really hard to see what it looks like so I know a lot of people were a little unsure about purchasing it. But let me put those fears to rest. This embossing folder gives the most beautiful look of linen. I can see me using this one a lot!!!      I don't know if you know, but you can use any of the Stampin'

Snowflake Showcase

Image
     Hello everyone! How are you all doing? My husband and I are coming home today after a little weekend with high school friends in Laughlin, Nevada. I wanted to share with you the new Snowflake Showcase that is coming soon. This set is amazing! And I am IN.LOVE. with the White Velvet paper. It feels so amazing. And you can die cut it and even stamp on it! I am doing a Live on my Facebook business page on Thursday, Oct 18th at 2pm MST. Here is my business page Stamping with Julie . Here is a Time Converter  to find out what it will be in your zone. Hugs, Julie      Here is a video that Stampin' Up! has released to show the showcase. It will be available to customers on Nov 1st.

Halloween Cauldron Graveyard Card

Image
     Hello my friends. How are you doing? I had my first physical therapy appointment yesterday and it went pretty good. I need to go to them 3x a week for 6 weeks and they gave me some exercises to do to help loosen up the muscles in my neck and shoulders so I can get my full range of motion back again.      Today I have a Halloween card for you all. I absolutely loved how I did the watercolor background last week on a Halloween card and knew I wanted to do it again. This time I did a card as a cute graveyard scene.      The best results I have had with blending colors when watercoloring is to keep your watercolor paper really wet and to work from dark to light. This lets the colors blend together and look seamless. If you want less of the blending then let the paper dry a little between each color.      I used the Everyday Punch the make the headstones, I cut them down a bit to make them appear smaller. I heat embossed both the ghosts and the cat. I used Stampin' Blend

Watercolored Sorry Card - Kylie Bertucci's International Highlights Challenge

Image
     Hello everyone! Today I have another special blog post for you. Kylie Bertucci, a Stampin' Up! demonstrator in Australia, has invited demonstrators from around the world to take part in a fun international highlight blog. And here is my card! The theme this month was "Sorry" so I thought of the Ribbon for Courage stamp set. Patty Bennett created this stamp when she reached $1 million in sales and it is honor of her mother who she lost to cancer.      I started with the Lovely Floral Dynamic Textures Impression Folder and used Watercolor paper. I used the Aqua Painters to put the ink exactly where I wanted it. When I was finished watercoloring I then watered down a couple drops of the Shimmer Paint in Frost White and painted it over the areas where I had watercolored.      I stamped my sentiment and then layered it and placed it onto the card over some of the Nature's Twine in Grapefruit Grove. I placed the whole piece onto a piece of the beautiful

Colorful Seasons Winter Card - Kylie's Demo Training Blog Hop

Image
     Hello everyone! I'm Julie Kight and welcome to my blog. How is your week so far? Today for you I have a special treat...a blog hop! I am part of a special training group for Stampin' Up! demonstrators run by Kylie and Bruno Bertucci from Australia. They are such an amazing husband and wife team! For this blog hop I wanted something for the season and I had just seen this cool technique done by another demonstrator and wanted to try it myself.      The Colorful Seasons stamp set and Seasonal Thinlits are so versatile as they can be used for any season as there are stamps and dies for each one. To do the inking technique I used the Coastal Cabana reinker and the new Shimmer Paint from the Holiday Catalog. I dropped four drops of the paint on a piece of Watercolor Paper down one side and then I dropped one drop of the reinker on two of those paint drops. Then I took an old credit card and swiped across dragging the drops.      I used some of the Sparkle Glimmer pape